A Taste of Success
| Silver Bullet Pages | |
|---|---|
|
|
|
Casting Plaster
Our previous attempt to cast silver bullets was partially successful, but the silver cooled too quickly, and we weren't able to completely fill the mold. I was planning on just getting the mold hotter. Naturally, this would increase the rate of oxidation and the thermal expansion of the mold would add another variable to our efforts. Dr. Jaansalu suggested that we could just reduce the thermal conductivity of the sprue plate, preventing it from cooling the silver so quickly, and all would be good.
Right. Reduce the what of the where? He explained his thoughts in small, simple words. Refractory materials have very low thermal conductivity. Metals are kind of the other end of the spectrum. If a layer of a thermally-resistant plaster was cast on top of the sprue plate, two things would happen. First, the sprue plate would be insulated, and cool much more slowly. Second, the silver would mostly contact the plaster, which acts as a thermal insulator. Overall, the silver should stay hot long enough to fill the mold. Well, sure it makes sense when he puts it that way.
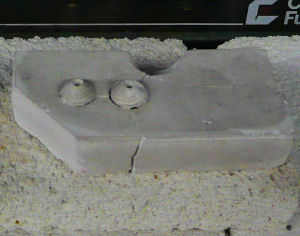
The good doctor prepared a batch of his special plaster. For those of you playing along at home, here's the recipe:
- 15g Plaster of Paris
- 5g Talc
- 24 g Water
The talc produces a very soft, easily damaged plaster that happens to be very heat-resistant. The sprue plate was covered with Vaseline as a releasing agent, and a bit of duct tape wrapped around it as a form, and the plaster was cast right on top of the plate. When the plaster dried, a hole and countersink was drilled to facilitate pouring the silver. Then the plaster was baked at 250°C, (482°F) for a few hours to dessicate it thoroughly. As the photo clearly shows, one of our plaster insulators was cracked. Hopefully it will still work.
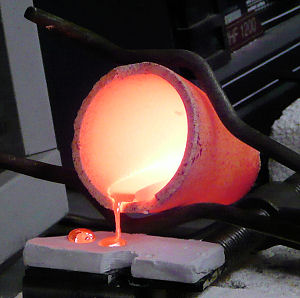
Having prepared a couple of plaster insulators, it was time to actually make a silver bullet. We melted the silver in exactly the same way as our previous attempt. About five ounces of silver were placed in the furnace, which was brought to 1100°C (2012°F). That's pretty warm, folks. When it was hot, we poured the silver bullets. This time the silver entered the mold easily, and I was able to fill it completely. My pouring technique still needs some help, but the equipment worked perfectly! In the photo to the left, you can see I'm just finishing pouring the second bullet. The sprue plate is covered by the plaster insulator, and small "buttons" of excess silver can be seen above the mold cavities.
After allowing the silver to solidify, we moved the the next problem. The sprue plate is designed to pivot across the mold body, shearing across the base of the bullet and cutting the sprue (that bit of metal connecting the bullet to the pouring cavity). I've mentioned several times that silver is harder than lead. A quick tap with a mallet is all that's needed to cut the sprue on a lead bullet. Would the sprue-plate work with silver? A couple of sharp raps with the mallet, and we found the answer is clearly "Yes", although it takes considerably more effort. Enough extra effort that I suspect some maintenance may be necessary after every few silver bullets. Our first genuine silver bullets rolled onto the lab bench, and they looked great!
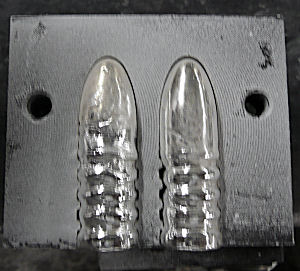
We noticed a slight bit of pitting, and a hint of oxidation in the mold after this pour, and decided to try a different release agent. After spraying the mold with a bit of Boron Nitride, we set up for the second pour. This time the insulator was cracked. We pushed it all into place, and hoped it would serve well enough to complete the pour. When I poured the bullets, it shifted, and silver began to run over the side of the mold. I paused for a second (never a good thing when casting), then resumed pouring. The good news is that insulator held. The bad news is that my pausing had allowed the first part of the pour to partly solidify, resulting in a poorly cast bullet. The photo shows the two bullets from this pour still nestled in the mold. Notice the mold is a whitish-gray color from the Boron Nitride. The voids in the base of the bullet on the right and the wrinkles in the bullet on the left are due to my poor casting. You can also see gaps at the top of the mold where the bullets have shrunk while cooling, and the bullets were still far too hot to touch when this photo was taken. The first two bullets were definitely prettier.
Of Weights and Measures
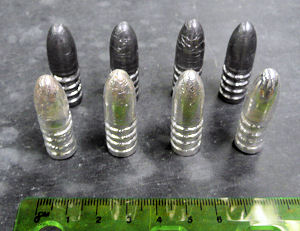
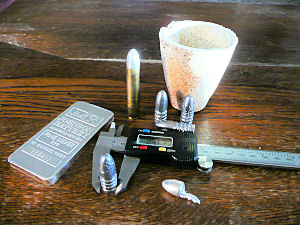
So, we've got four silver bullets. Two of them are flawed, but two came out quite nicely. In this photo you can the lead bullets we cast last week arrayed behind our newly cast silver bullets. The purists will notice that not all of the bullets are perfectly smooth and lovely; a sad testament to my lack of casting experience. However, the silver bullets certainly look functional.
So, we predicted that silver bullets should be a little lighter and smaller in diameter than their lead counterparts. With bullets of both types cast from the same mold, we're finally in a position to make the comparisons. The lead bullets weighed, on average, 35.13 grams (1.13 Troy ounces or 552.1 grains). The silver bullets averaged 30.52grams, but the last two bullets had obvious wrinkles and voids, which resulted in lighter weights. The first two bullets, which were better formed, were almost identical in weight and averaged 31.48 grams (1.01 Troy ounces or 484.8 grains).
I measured the diameter of each bullet at the base, at two positions offset roughly 90°, and then averaged all readings. The lead bullets averaged .453 inches (1.151 cm), and the silver .448 inches (1.138 cm).
What Does it All Mean?
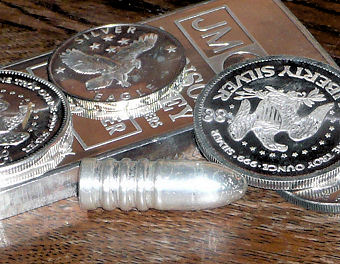
Our experimental data confirms our previous calculations.Silver bullets are lighter than lead, but still sufficiently dense to achieve good ballistics performance. The diameter, however, is five thousandths of an inch too small. This, combined with the hardness of silver, would doubtless produce extremely lackluster performance were we to actually load and fire these bullets. However, we had never intended to fire these bullets. We should have enough information to design a mold to cast bullets for the .444 Marlin Mercy was supposed to have used.
Over the next few weeks, we'll pursue this lunacy to the next step, and try to obtain an appropriate mold. Then we can try to cast bullets that might actually work in a real gun. By now, the astute reader should have no trouble seeing where this is going <grin>
Things may be quiet here for a few weeks -- bullet molds take time to design, and even more time to build.
Designing a Custom Mold